Pages

Friday, October 9, 2015

Going Halloween Crazy

So Halloween is coming up quick and I'm trying to get ready. I've been playing with my Papertrey Petite Places dies lately and I've come up with these:


I totally didn't think of using the haunted house as anything but until Betsy Veldman showed a farmhouse she'd made with it. I SO had to give it a try and as it turns out, it's my husband's favorite of the batch. You can see a bit of the purple fun foam I used to make the shaker's thickness. I think this is going to go on a card but I'm not 100% sure about that yet.

I also cranked out a bunch of Halloween clips for my son's classmates and some other friends. I guess I need to come up with treat bags to put them on now... details, details!


Sunday, August 30, 2015

Papertrey Ink- SAF Wooden Bangles

As I mentioned earlier, I definitely lost quite a few of these in the making- 50% to be exact. I also wasn't able to get them perfectly round or quite small enough. I'll have to find a better item to shape them in next time. Still, it was a neat project to try out. I decided to make a Halloween bracelet. I painted it with orange Martha Stewart glitter paint a few times to get a good coating. Once it was totally dry, I used the two little bat stamps from the Spooky House Petite Places set with Versamark and black glittery EP. I did find out one issue with heat embossing that Maile Belles didn't mention. :) It turns out if you use the heat gun on these too long, they start to straighten back out some. Oops. However, if you continue to use it long enough to heat it up substantially, you can get gently bend them enough, get them back into their shaper and reform them. Whew!


Papertrey Ink- SAF Pattern Mix & Match

Ok. I have to say that this was a bit of a cheat. I was trying to figure out how I could incorporate some PTI products from my thin collections when I recalled I'd received a pack of paper in my first PTI order- the Make It Market Christmas kit from last year. I hadn't used it at all because I just made houses from the set. Now this feels like cheating but Betsy Veldman did mention using papers from a matching set. I tried to find papers in the pack that had obvious small/medium/large patterns but pretty much they're all small. So, I used them all. I definitely want to get some other papers and do the mix but I'm happy to have done something.


The die is from Stampin' Up as is the cardstock.


Papertrey Ink- SAF Thread Nest

I've always liked the look of thread nests but I honestly hadn't really thought to use them. This was a good kick to try one. I used the Coats metallic silver thread that Laura Bassen recommended in her video.

I hate to say it but I didn't any PTI products to use on this one. I have mostly Petite Places stamps and dies and the Secret Agent set and they just weren't going to cut it here. Of course, I have more on the way now but they just won't make it in time.

Stamp & paper: Stampin' Up
Dies and Embossing Folder: Sizzix

Papertrey Ink- SAF Friday Night Fashion Show

So. Papertrey Ink had their big event yesterday- Stamp-a-Faire. They kicked it off Friday night with a fashion show where you could alter a tshirt in some manner. Well, don't expect to see me in an altered shirt- the crud went through our house last week and I'm still trying to shake the sinus crap and the oncoming chest cough. I was actually supposed to spend yesterday evening with gal pals and a solid dose of Rocky Horror Picture Show. I guess the upside is that I was able to craft instead. So, I've got a few projects to share, hopefully a few more to come and a few pictures of my "pre-work" that can be posted in place of an altered shirt.

One of the projects we could prep for was popsicle stick bracelets. I cooked 10 sticks and was only able to use 5 of them. And unfortunately, even those started to split at the one end. Oh well. At least i know how to do them now.


I also needed to clean my workspace- it was covered with, well, Papertrey projects I was in the middle of.

Wednesday, August 19, 2015

Pencil vase for teacher's gift

I've been making these for the past few years for teachers' gifts. The nice thing is that once the flowers we add die off, the vase makes a great pencil/pen/scissors holder. I was asked about making these the other day and I once again realized that I've never so much as taken a picture of one. I'm usually in such a rush to get them to the school I totally forget until I've dropped them off and of course, way too late at that point. This year, I got this! :)
 

I just get a straight-sided vase from The Dollar Tree and, as it turns out, 39 pencils. I use my hot glue gun on the high temp since I don't think the low temp would stay liquid for long enough. As it is, I only put a squiggle of hot glue wide enough for two pencils. Otherwise, I find I'm either scraping cooled glue off of the glass or remelting it with the tip of the glue gun and neither one is any fun.


The last pencil can be a bit iffy and unfortunately on this one, I found that I had way too much space for one pencil but not quite enough for two. In the end I went with two and one sits a bit on top of the two on either side. Last tip, I do my best to make sure that the writing doesn't show. I think it would look nice to have the writing facing out but doing it consistently while trying to quickly attach them to the glass isn't worth the effort.

Let me know if I missed anything!


Sunday, August 2, 2015

Unity May/June Growing in Unity Blog Hop


If you're here from the hop, welcome to the end of the trail- I'm your last stop. If you're here because you wuv me, awwww! Thanks for dropping by!

I was invited to come back to do one more project for Unity, participating in the May and June GIU Gals hop. Well, of course I said "YES!" immediately after getting Maria's email. Then the nervousness crept in. Would I get a "cool" stamp? One that would "jive" with my personality? The answer to that question was a resounding YES! Kelli (I'm guessing it was you Kelli. If not, thanks to the person who happened to randomly pick me for to be the recipient of Lexi) sent me Lexi Girl which I'm thrilled with. One of my favorite lines of Unity stamps is Angie Blom's Angie Girls so getting one of them was just perfect by me. (Of course, I realized later that this is a Angie Girl hop but that's beside the point- I still love Lexi.)

I recently saw a challenge for paper piecing and realized I hadn't done that in a while so the boxes and flowers are pieced. I added dots to Lexi's shirt just because I wanted to, nothing more. I used Copics to color the image.


If you haven't visited the rest of the hop stops, here they are in order. Don't forget to comment along the way- there will be two random winners who will be announced on Wednesday's GIU post.


Lucinde van Ballegooijen: http://lucilight.nl/cms/index.php/blog
Laura Turcotte: laurascreativeworld.blogspot.ca 

Brittany Morgan: http://craftypaperbee.blogspot.com/

Renee Moran: http://becauseofdelaneyjane.blogspot.com
Sheena Brooks: http://kanatanewfpapercrafts.blogspot.com/

Tara Sell: http://curlecues.blogspot.com/

Angela Walters: http://www.lifewithawienerdog.com/

Maria Levine: www.riacreations.blogspot.com

Jen Gerwig-Dively: You're kidding, right?! You're already here!  :)

Thanks again for dropping by and have a great remainder to your weekend!

Monday, June 22, 2015

GIU winners and questions answered

I wanted to thank all of you for dropping by last week and leaving me such positive, supportive comments. I appreciated each and every one of them. I responded to those of you that I could based on email addresses associated with your accounts. If I didn't, I wish I could have. There were a few questions that I couldn't answer and a few that several of you asked and I want to answer those all here to share the answers.

Day 1:Yes, the hubby really liked the beer card. :) To get the foam, I used a Versa marker to "wet" the foam area and covered it with white EP. I didn't try to be neat and I left some of the excess powder on the card instead of wiping it off. This became the bits of foam falling down the glass. I think I repeated this process 3x so the foam layer is pretty thick. Goosebumps is a spray that I've heard you can find at Michaels (I picked mine up a scrap show the other year.) The mist sits in bumps on your surface and dries that way. It's great for dewy mists or condensation. If I recall, it came in different colors but I just picked up the clear. You can see that I sprayed probably a bit close so it angled but I imagine if I'd done it from further back or from the top, it would have made drops. I did mask the background a bit so the Goosebumps were only on the glass and foam.
Goosebumps spray and embossed foam

Day 2: The otter fur was done by coloring it in little tiny lines, repeating them over and over with different shades of brown Copics, darker each time but with fewer lines and pushed out more to the far edges as I moved to darker shades.

Day 3: The glass was all colored with Copics. I tried to consider which colors would be overlapping one another and colored the overlap with the lighter color. Then I went back and used a lighter shade of the 2nd overlap color to add to the overlap area to get the mixed colors in the overlap. I hope that makes sense. When I talked about the refracted colors, I was referring to the colors that would fall on the table as light went through the glass. If these were solid instead of transparent, it would be the shadows they cast on the table. It would be similar to what you see on the table in this image.
Refracted light on the table

Day 4: The taco shell and nacho chip were also colored with Copics. Similar to the otter, I laid down the lightest color first and then dotted the next darker shade on top. I repeated with the next darker after that, and so on, adding fewer and fewer dots as I moved to darker shades.

Day 5: Putting the white paper behind the glass was simply an end result after trying several things to make the glass show up against the background. You know how that goes sometimes.  :)

If I've missed anything, please let me know. I'd be happy to answer any other questions.


And now. FINALLY! The moment you've all been waiting for.  My winners! Immi and Mary Holshouser, congratulations! If you could please send me your mailing information, I'll get it right over to Unity so they can get your prizes out to you. Thank you all for your comments last week!

Friday, June 19, 2015

GIU Day 5

Well, here we are at the end of my Growing in Unity journey this year. I hope I've been able to kickstart an idea or three for you or just given you a smile along the way. It's been a great week for me and I appreciate you joining me.

My final card is a bit more ripply than I'd like but it's a great way to enter a hot summer weekend.

Knowing the image and sentiment don't exactly mesh, I plan to add a note inside to the effects of "...or at least make limeade!" Though the glass image was stamped and colored on vellum, I helped the image pop more against the background by stamping it again on white paper, fussy cutting it, and taping it directly behind the image on the vellum. I found that the glass vanished too much into the background without doing this.

Again, thanks for joining me this week and don't forget to comment on all of the week's posts to have a chance to win a grab bag of Unity goodness. If I can find your email address in/from your comment, I'll send you a note as well as posting a winner notice here on my blog in the next few days.

Have a wonderful weekend!

Ingredients: 
Stamps: Live Half Full, When Life Gives You Limes
Coloring: Watercolor pencils, Tim Holtz Distress & Momento ink

Thursday, June 18, 2015

GIU Day 4

Hi there! It looks like we're moving into the homestretch for my Growing in Unity week. Today, I'm sharing two more ATC cards but instead of these being for the munchkin, these will end up in the hubby's lunchbox. I think sometime in the future when he's having a crunchy week at work, one of these may appear in his lunch to cheer him up a bit.


I hope you have a great day and I'll see you back here tomorrow. Don't forget, you can't win if you don't comment!  :)


Ingredients:
Stamps: Nacho Problem, Fun Burst, Don't Wanna Taco, Dots for Sure
Coloring: Copics, Momento, VersaMark & Stampin' Up inks

Wednesday, June 17, 2015

GIU Day 3

Hi there and welcome to Day 3 of my Growing in Unity week!

I've loved coloring glass images for years so I was head over heels when I saw this stamp a while back. If I'd really gotten into it, I would have done the refracted image on the table in front of the bottles but I stopped while I was ahead.

\

I hope you'll visit again tomorrow. Don't forget to leave a comment to have a chance at a great Unity prize at the end of the week.

Ingredients:
Stamps: Array of Bottles, Bitty Happy Birthday

Coloring: Copics, Momento ink.

Tuesday, June 16, 2015

GIU Day 2

Hi! Welcome to my Growing in Unity Day 2! If you missed yesterday, jump back, have a look, leave a comment and possibly win a great Unity prize at the end of the week!

I want to start including notes in my son's lunchbox next school year so I'm trying to get a jump on them. I'm hoping to have one for each week when it's all said and done.


These are ATC-sized (2.5x3.5") so they'll fit nicely in with his noshies.

Hope to see you back tomorrow! 

Ingredients:
Stamps: "Pun Potato, Fry {and Beans}", Dots for Sure, Otter Nonsense, [not sure about the notebook paper- I received that in a Unity grab bag]
Coloring: Copics, VersaMark, Tim Holz Distress, Stampin' Up & Momento inks

Monday, June 15, 2015

GIU Day 1

Hi there!  If you've come from Unity and you don't know me, welcome! If you're a return visitor, welcome back! I missed the chance to be a Growing in Unity Gal last year so I practically stalked the FB page to sign up for this year. So welcome to my Unity week.!
When I first saw this set, I had to have it knowing my hubby would get a kick out of it. I'm actually giving him this card for Father's Day this year.  Unfortunately, I sealed it up before I realized that 1. this picture was a bit crooked and could stand a re-take and 2. before I remembered to take a close-up that shows the Goosebumps spray on on the glass that makes it look like it really has condensation on it. Very cool product. Guess you'll just have to take my word for it.


I hope you'll join me here again tomorrow. Please leave a comment to have a chance at winning a Unity prize at the end of the week.


Ingredients:
Stamps: Unity: "Keep Calm, Have a Beer", Quatrefoil Background

Coloring: Copics, Stampin' Up & Momento inks

Thursday, June 11, 2015

Papertrey Ink Petite Places for Father's Day

I've been loving the Papertrey Ink Petite Places since they introduced it for Christmas. I picked up the garage/fire station pieces and made this jar topper for my dad and ornament for my husband. PI is seriously cutting into my wallet these days!


More Papertrey Ink Key Fobs

What can I say? They made for great teacher/class mom/librarian/bus driver/Father's Day presents!


I've seriously been loving these dies. You can go girly, you can go masculine, you can drop it in the middle. The last 2 pictures are of a double-sided fob I made for the school librarian. She's a huge Harry Potter fan I couldn't decide if she'd prefer Gryffindor or Slytherin so she gets both. The unfinished fob in the 2nd picture was one I made for my father. I decided it looked a bit too much like flowers so I'll save it and I made him the 1st one in the same picture instead.

Monday, May 25, 2015

Papertrey May Blog Hop Challenge

So I think I mentioned around Christmas how in love I am with Papertrey Ink. If I didn't, I should have. Their May release included a set of dies for making key fobs and I absolutely had to get them all. PERFECT gifts. In a big way! I've made a few but I'll post the rest when I finish this batch. However, this one I did for the the Papertrey Ink blog hop going on today.


This was the inspiration piece:

Sunday, April 19, 2015

Paper Pumpkin Shaker

So I had a Stampin' Up party back in Jan. and luckily, it also happened to be the first month of Sale-a-bration so I was able to get a promotion, a discount on 3 months of a Paper Pumpkin subscription, 1/2 off.  Bonus!  I'd tried Paper Pumpkin early on and was supremely disappointed.  However, I'd seen a few more recent kits and thought I'd give it another go.  I can't say I've been wild about them but they're definitely better and I was able to order one of the kits I REALLY liked from a few months ago.  I also have liked a lot of the "hacked" versions of the kits I've been finding on line and I thought I'd do a mash up up two kits to enter over at My Pumpkin Challenge's April Sew Pretty, Sew Simple Challenge.


Remainder of 30 Day Color Challenge

So you may all be thinking to yourselves, oh look, she did it again.  Started something. Vanished.  Didn't finish.  Well, sometimes, many times, you'd be right.  I definitely have a pile of unfinished projects.  My 7yr old gets his "quickly bored, time-to-move-to-the-next-thing" personality from someone and it isn't the hubby.  HOWEVER!  In this case you'd be wrong I'm pleased to say.  I found out that Kathy preferred having our pieces posted on Instagram so while I did get them posted there, I never checked back in here- I was just happy to get a piece a day done.  While I haven't gotten them mounted onto cards yet, I have trimmed the ones that needed to be and here's the full compilation of what I did in 30 days.

I enjoyed it so much I actually went out and picked up a few new Copic markers and I'm looking forward to Kathy's next run of this in June.

Tuesday, March 10, 2015

Coloring Challenge- Day 7 Mason Jar

This is an SU stamp I've had hanging around uninked for quite a while.  I have a lot of those.  Last year's uncrafty slump definitely set me back a bit.  I would have liked to have spent more time making the jar photo real but I just didn't go there.


Monday, March 9, 2015

Coloring Challenge- Day 6 Shitake


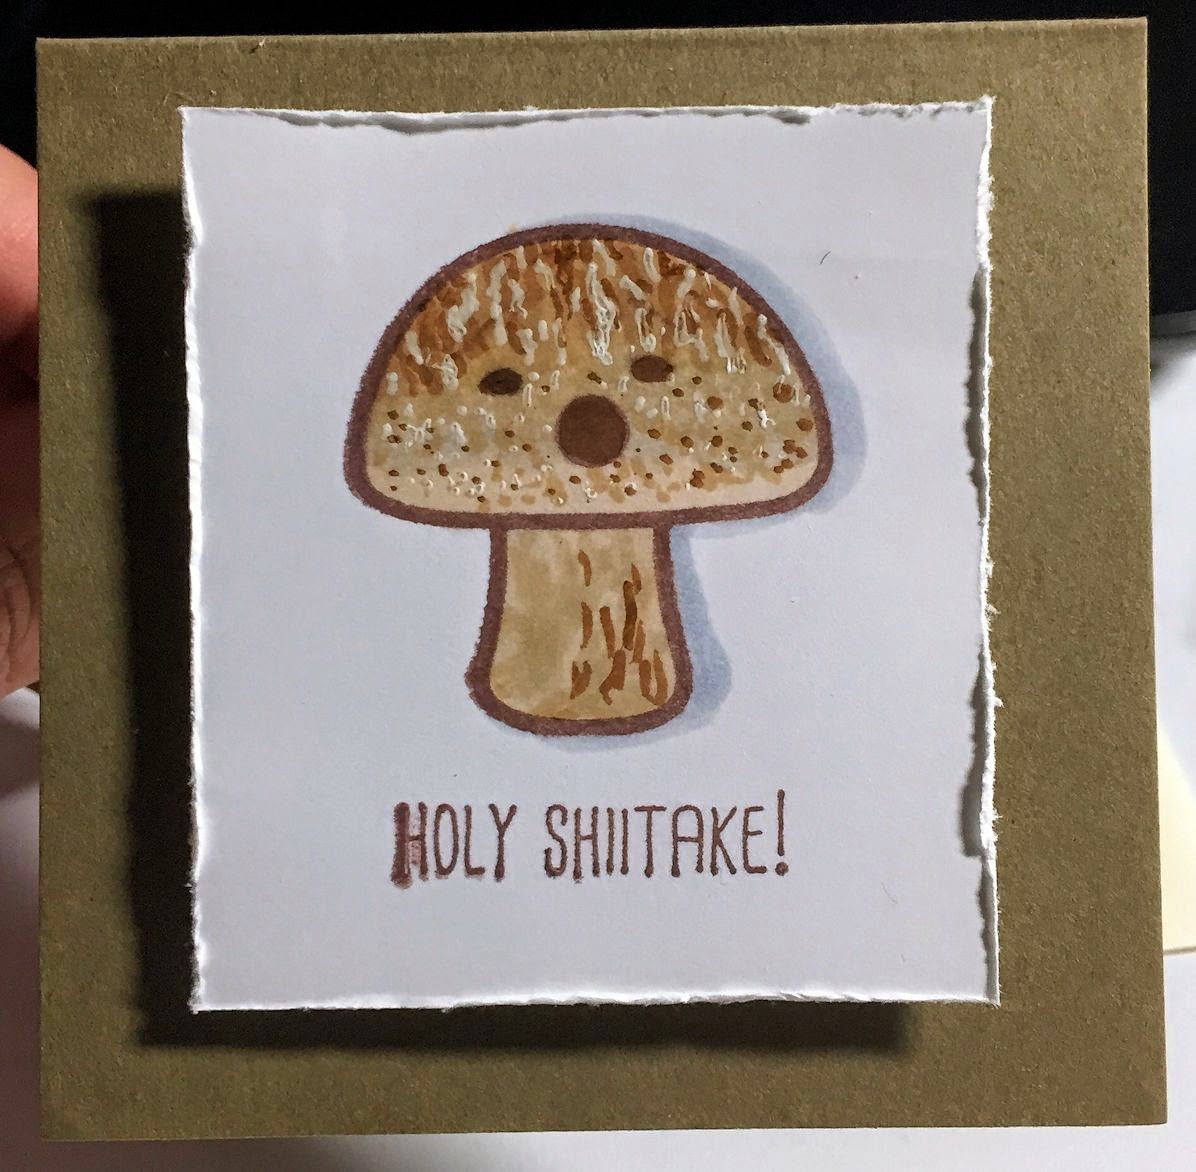
Hubby's having/going to have one of those weeks at work and I've been wanting to break out my Unity pun stamps so there you have it.  Today's coloring project.  Quick and easy but with an end goal in mind this time.  It's colored with Copics and a white gel pen and mounted on a mini Stampin' Up card.


Sunday, March 8, 2015

Coloring Challenge- Day 5 Angel Gal #3


I was planning to do something else today but as I said, all of these SCACD images were already stamped and oh so convenient.  :)  I did this with watercolor pencils but I'm not sure if I'll go back and blend or not.


Saturday, March 7, 2015

Coloring Challenge- Day 4 Angel Gal #2


Ok.  Got her done.  I really need to take that hair and skin class.  :)  Obviously I was having serious inking problems on these images so this is another one I'll trim out entirely.  It even smudged a bit on her cheek when I was working on it today.  Grrr.  This was colored with Crayola colored pencils.


Friday, March 6, 2015

Coloring Challenge- Day 3 Angel Gal #2


Well, I didn't get far on this one but it's a start.  It's another SCACD (Susana's Custom Art & Card Design) image. Did I mention there were 8 stamps in the prize kit?